
In quaint Camden, Maine, on the quaintest of Main streets, in all the quaint little boutiques lays a bounty of lavender, catnip, and balsam fir. During a road trip to this magical land (the purpose of which was to attend and celebrate the wedding of Debbie & Nathan) I procured a 1 ounce bag of said balsam fir. In my endless effort to become an adult (or Martha Stewart) I decided to make a sachet to keep in my underwear drawer; I craved for the aroma to bond to my unworn lace panties and last year's swimsuit. When I asked Greg what shape to make the sachet he quickly and happily yelled out "PENIS!", which I thought was not a bad idea but could be improved upon. And that my dear friends, is how the Vagina Balsam Fir Sachet came to be. See below for directions.

supplies needed
- Fabric - (1) fat quarter or a 6" x 10" scrap
- Tulle - 1" wide strip x 10" (will be cut in half)
- Gemstone - whichever kind your vagina desires
Step 1 - Vaginas come in all shapes & sizes
Figure out what you want your vagina sachet to look like. I used grid paper and a french curve to draw a lip which was 4" w x 1" d. Then, in a dash line, I added .5" to the shape for my seam allowance. Note that your seam allowance could be .25", which is common for quilters.

drawing the curve
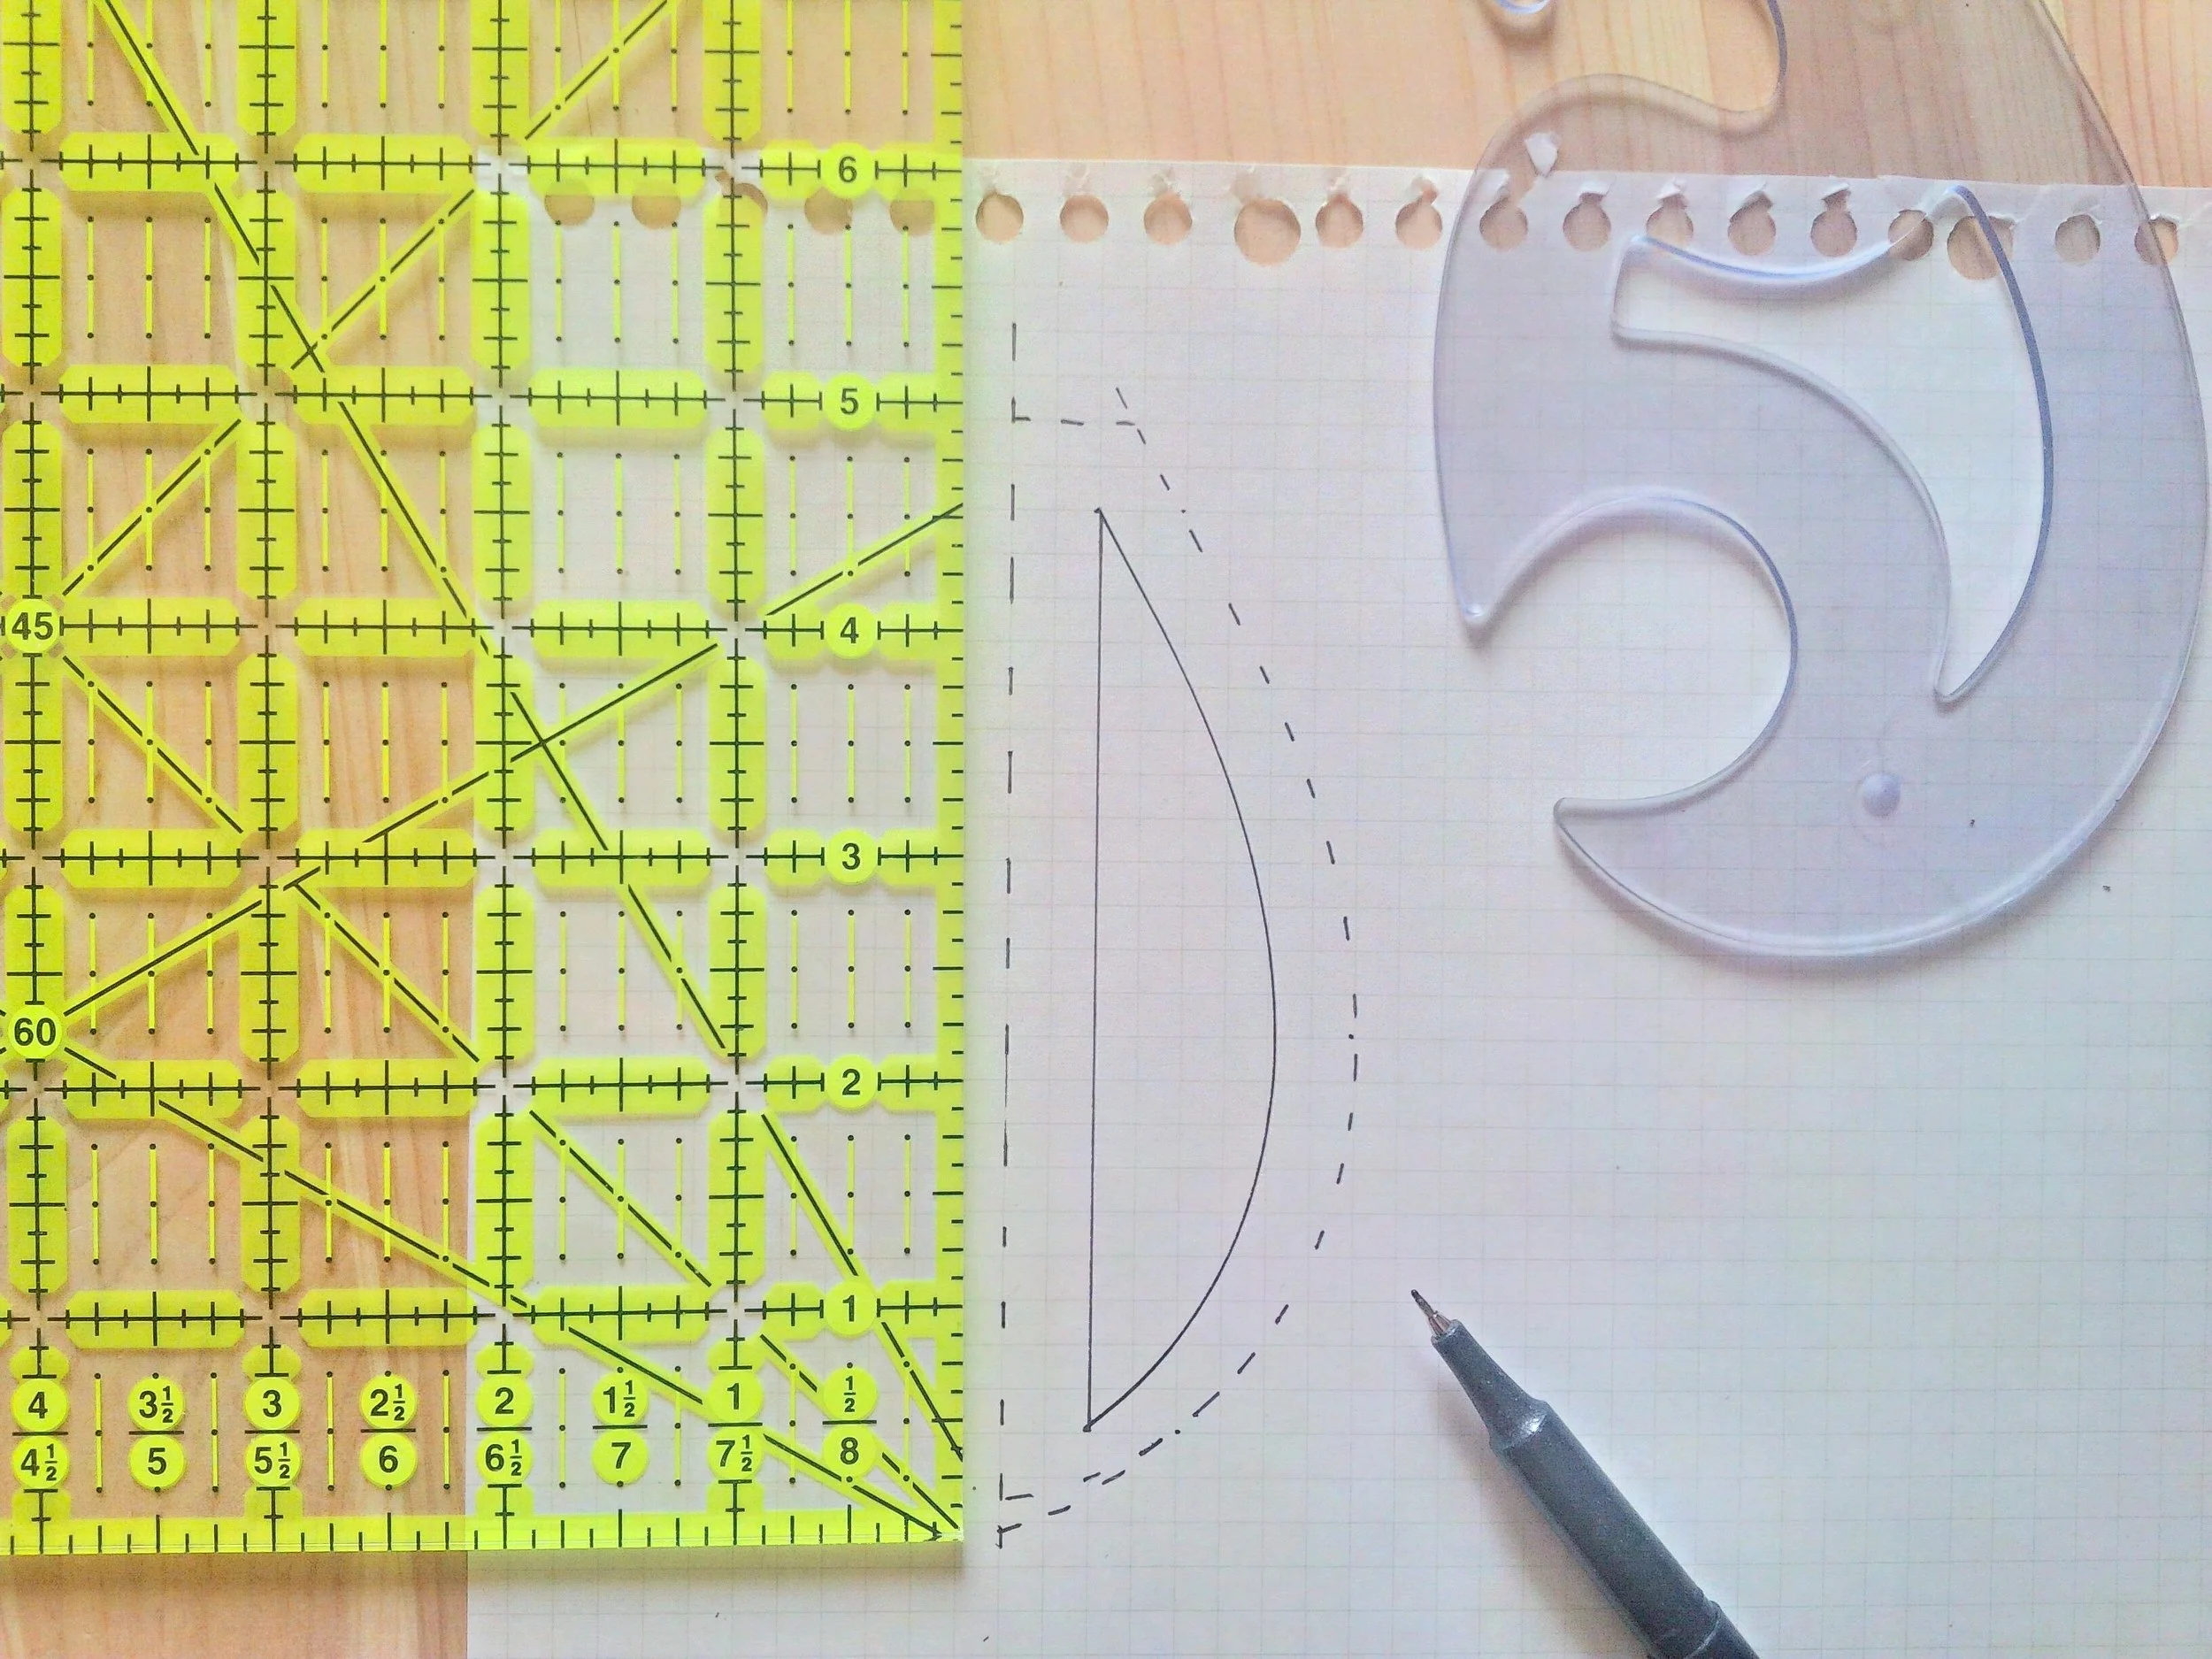
adding the seam allowance
Once I was happy with the shape and size of the lip template I cut it out and started on the back face of the sachet. To create the back face I traced over the lips template, midway through flipping the lips to create the mirror image and complete the shape. Does that make sense? Anyway, when finished drawing your back face template take your scissors and cut it out.

flipping the lips
Step 2 - Marking your territory
Once your templates are cut out, place them on the fabric. When happy and ready, cut out your pieces. A few things to keep in mind:
- I placed my template on the front or right side of the fabric knowing I would not be using a marking tool but rather cutting around the pinned template. If you prefer to mark of trace templates prior to cutting, do so on the "wrong" side of the fabric
- Pay attention to the grain of the fabric as you place your templates. Pay extra special attention if your fabric has a pattern. Cutting off of the grain will make a wonky vagina sachet
- This Image shows the back face template and the lip template. For the other lip I flipped the template and cut out another piece. This sounds more confusing than it has any right to be

laying out the template
Step 3 - Get it together
Things are about to happen, so collect your cut pieces, your gemstone, your filling (balsam fir), and your tulle. If you haven't done so yet, cut your tulle to the length of your lips - mine was 5"

with our powers combined . . .

gratuitous money shot
Step 4 - You are a sewing machine!
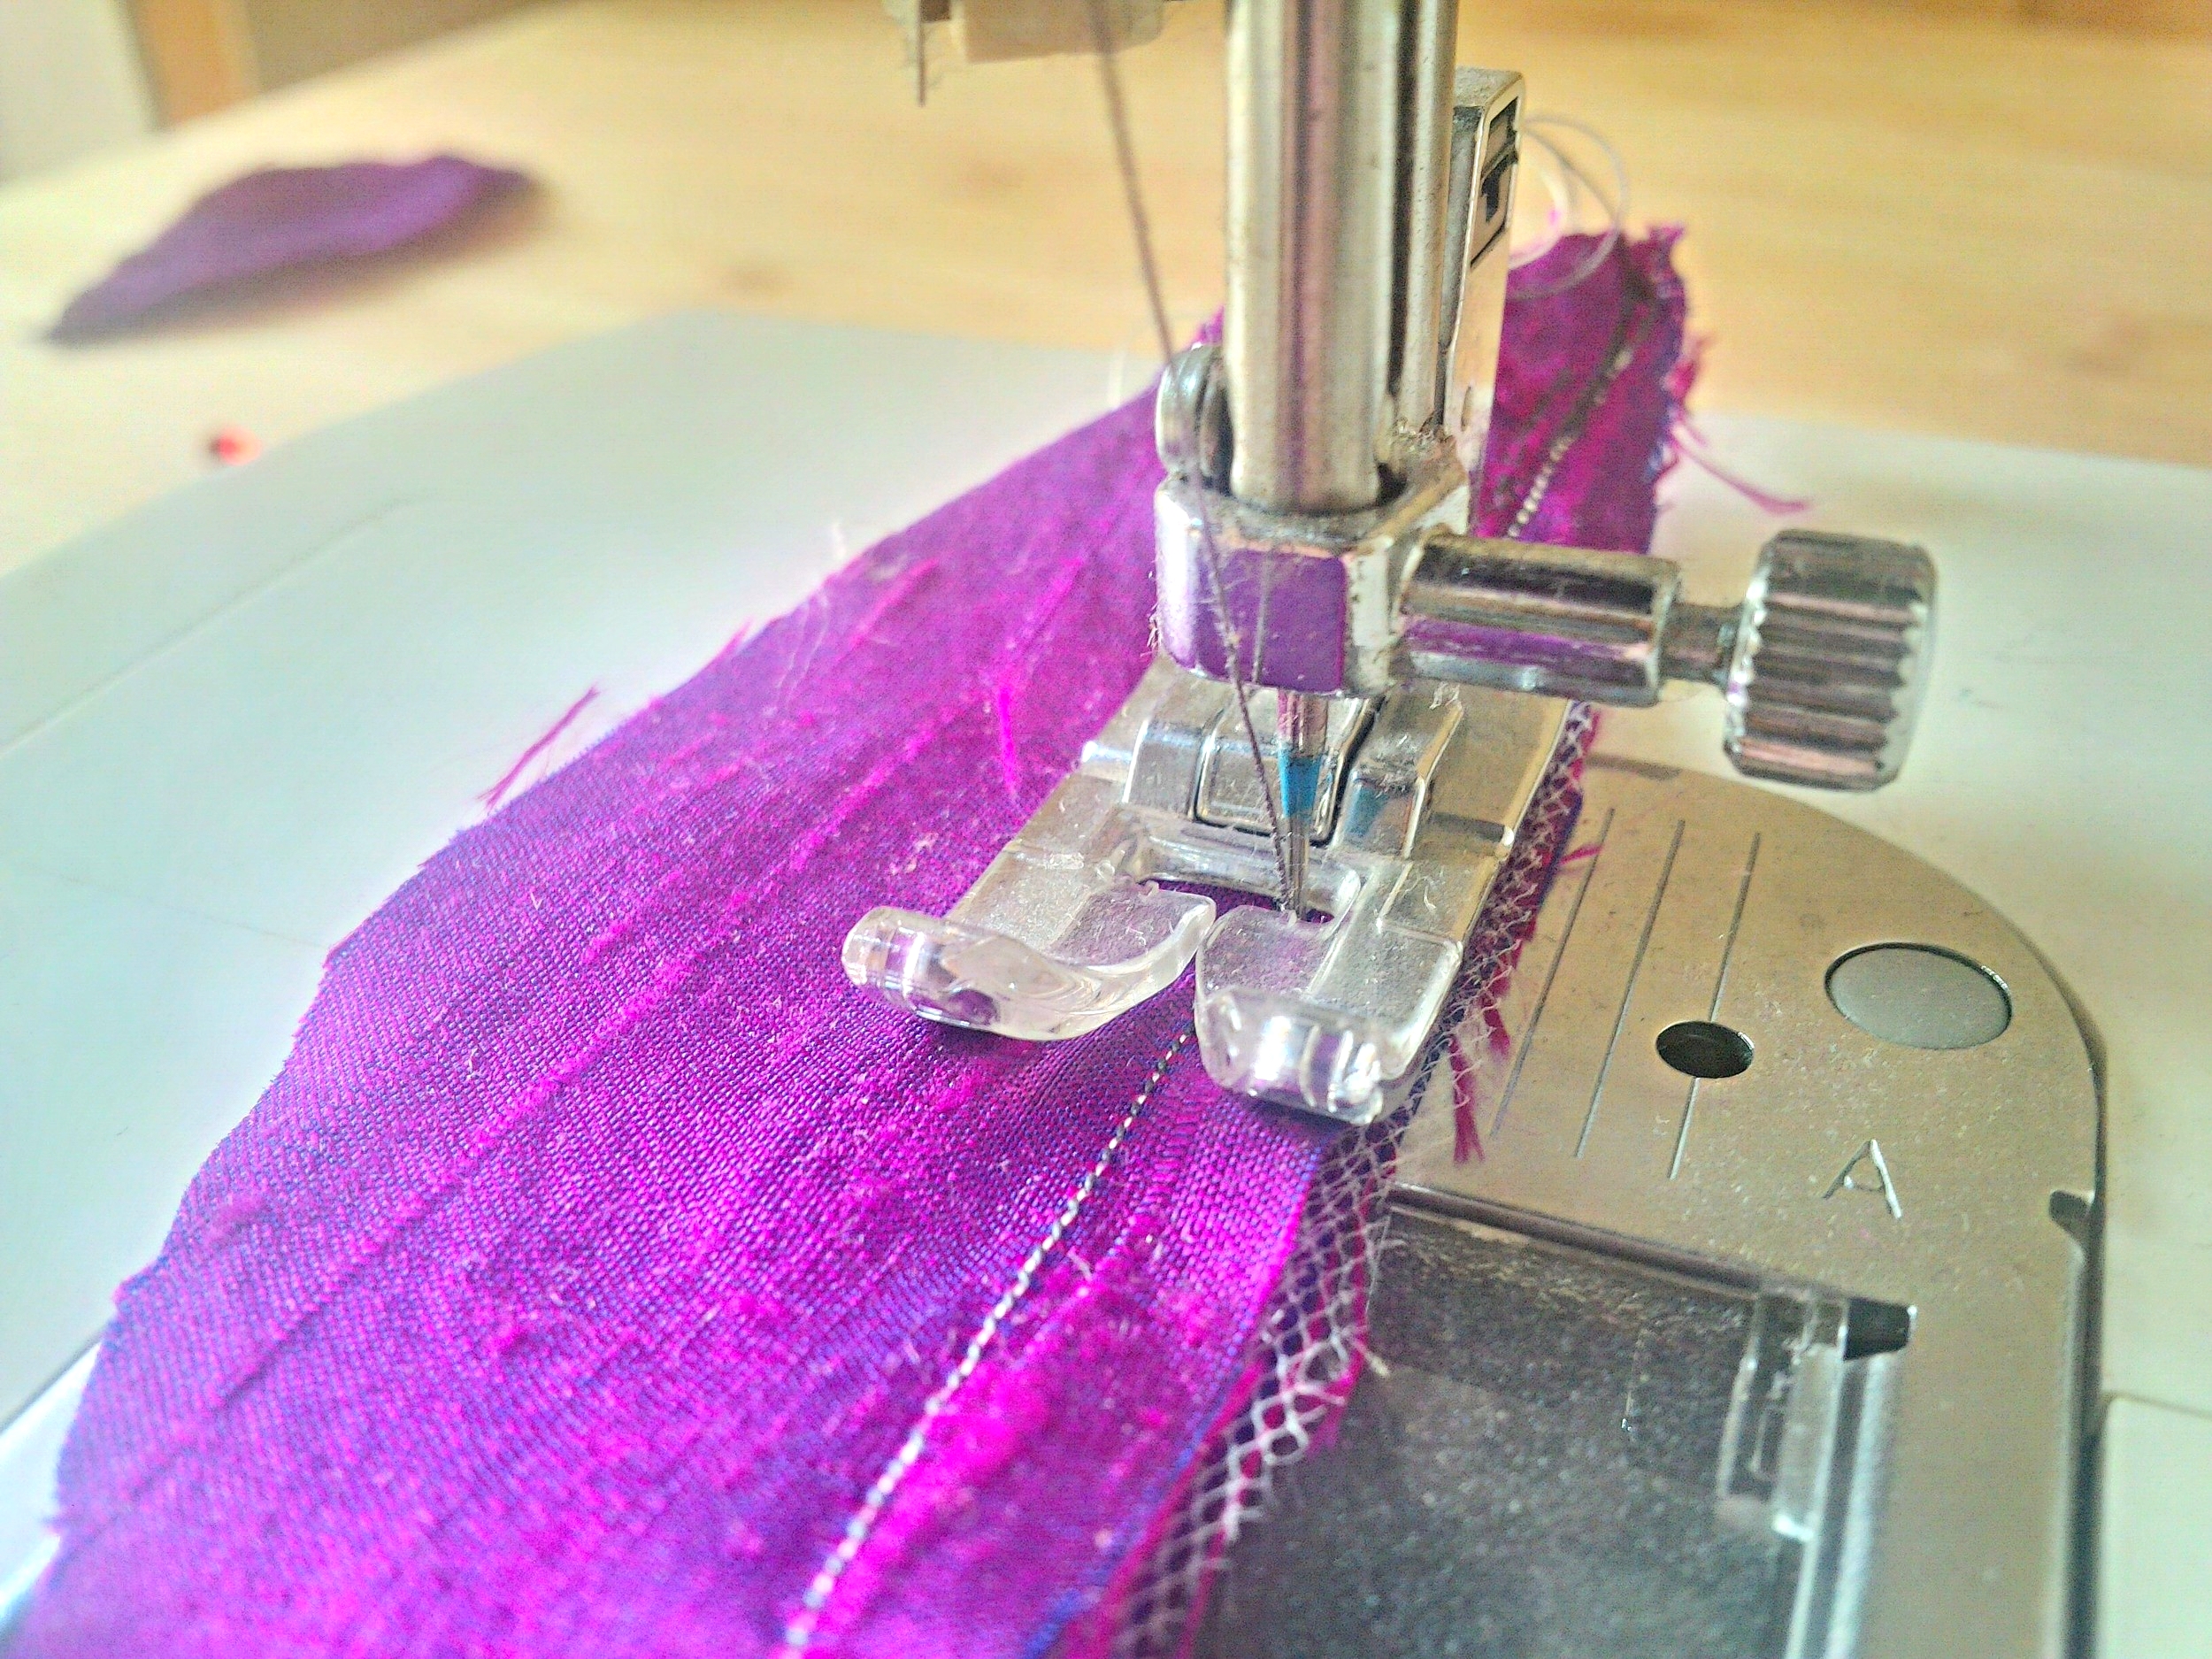
Begin by lining up you tulle the the right or front face of the left lip piece. Either by hand or machine, run a simple stitch line. Remember to leave the same seam allowance as what you measured in your template. Repeat with the right lip
*in retrospect I wish that I had added a bit more ruffle to the tulle. If you agree then feel free to add some jazz to that vaj

tulle attached to left lip
Next, sew the two (2) lips together. Remember to have the right/finished sides with tulle facing each other. When you open the lips it should resemble the blossoming flower of your lost youth.
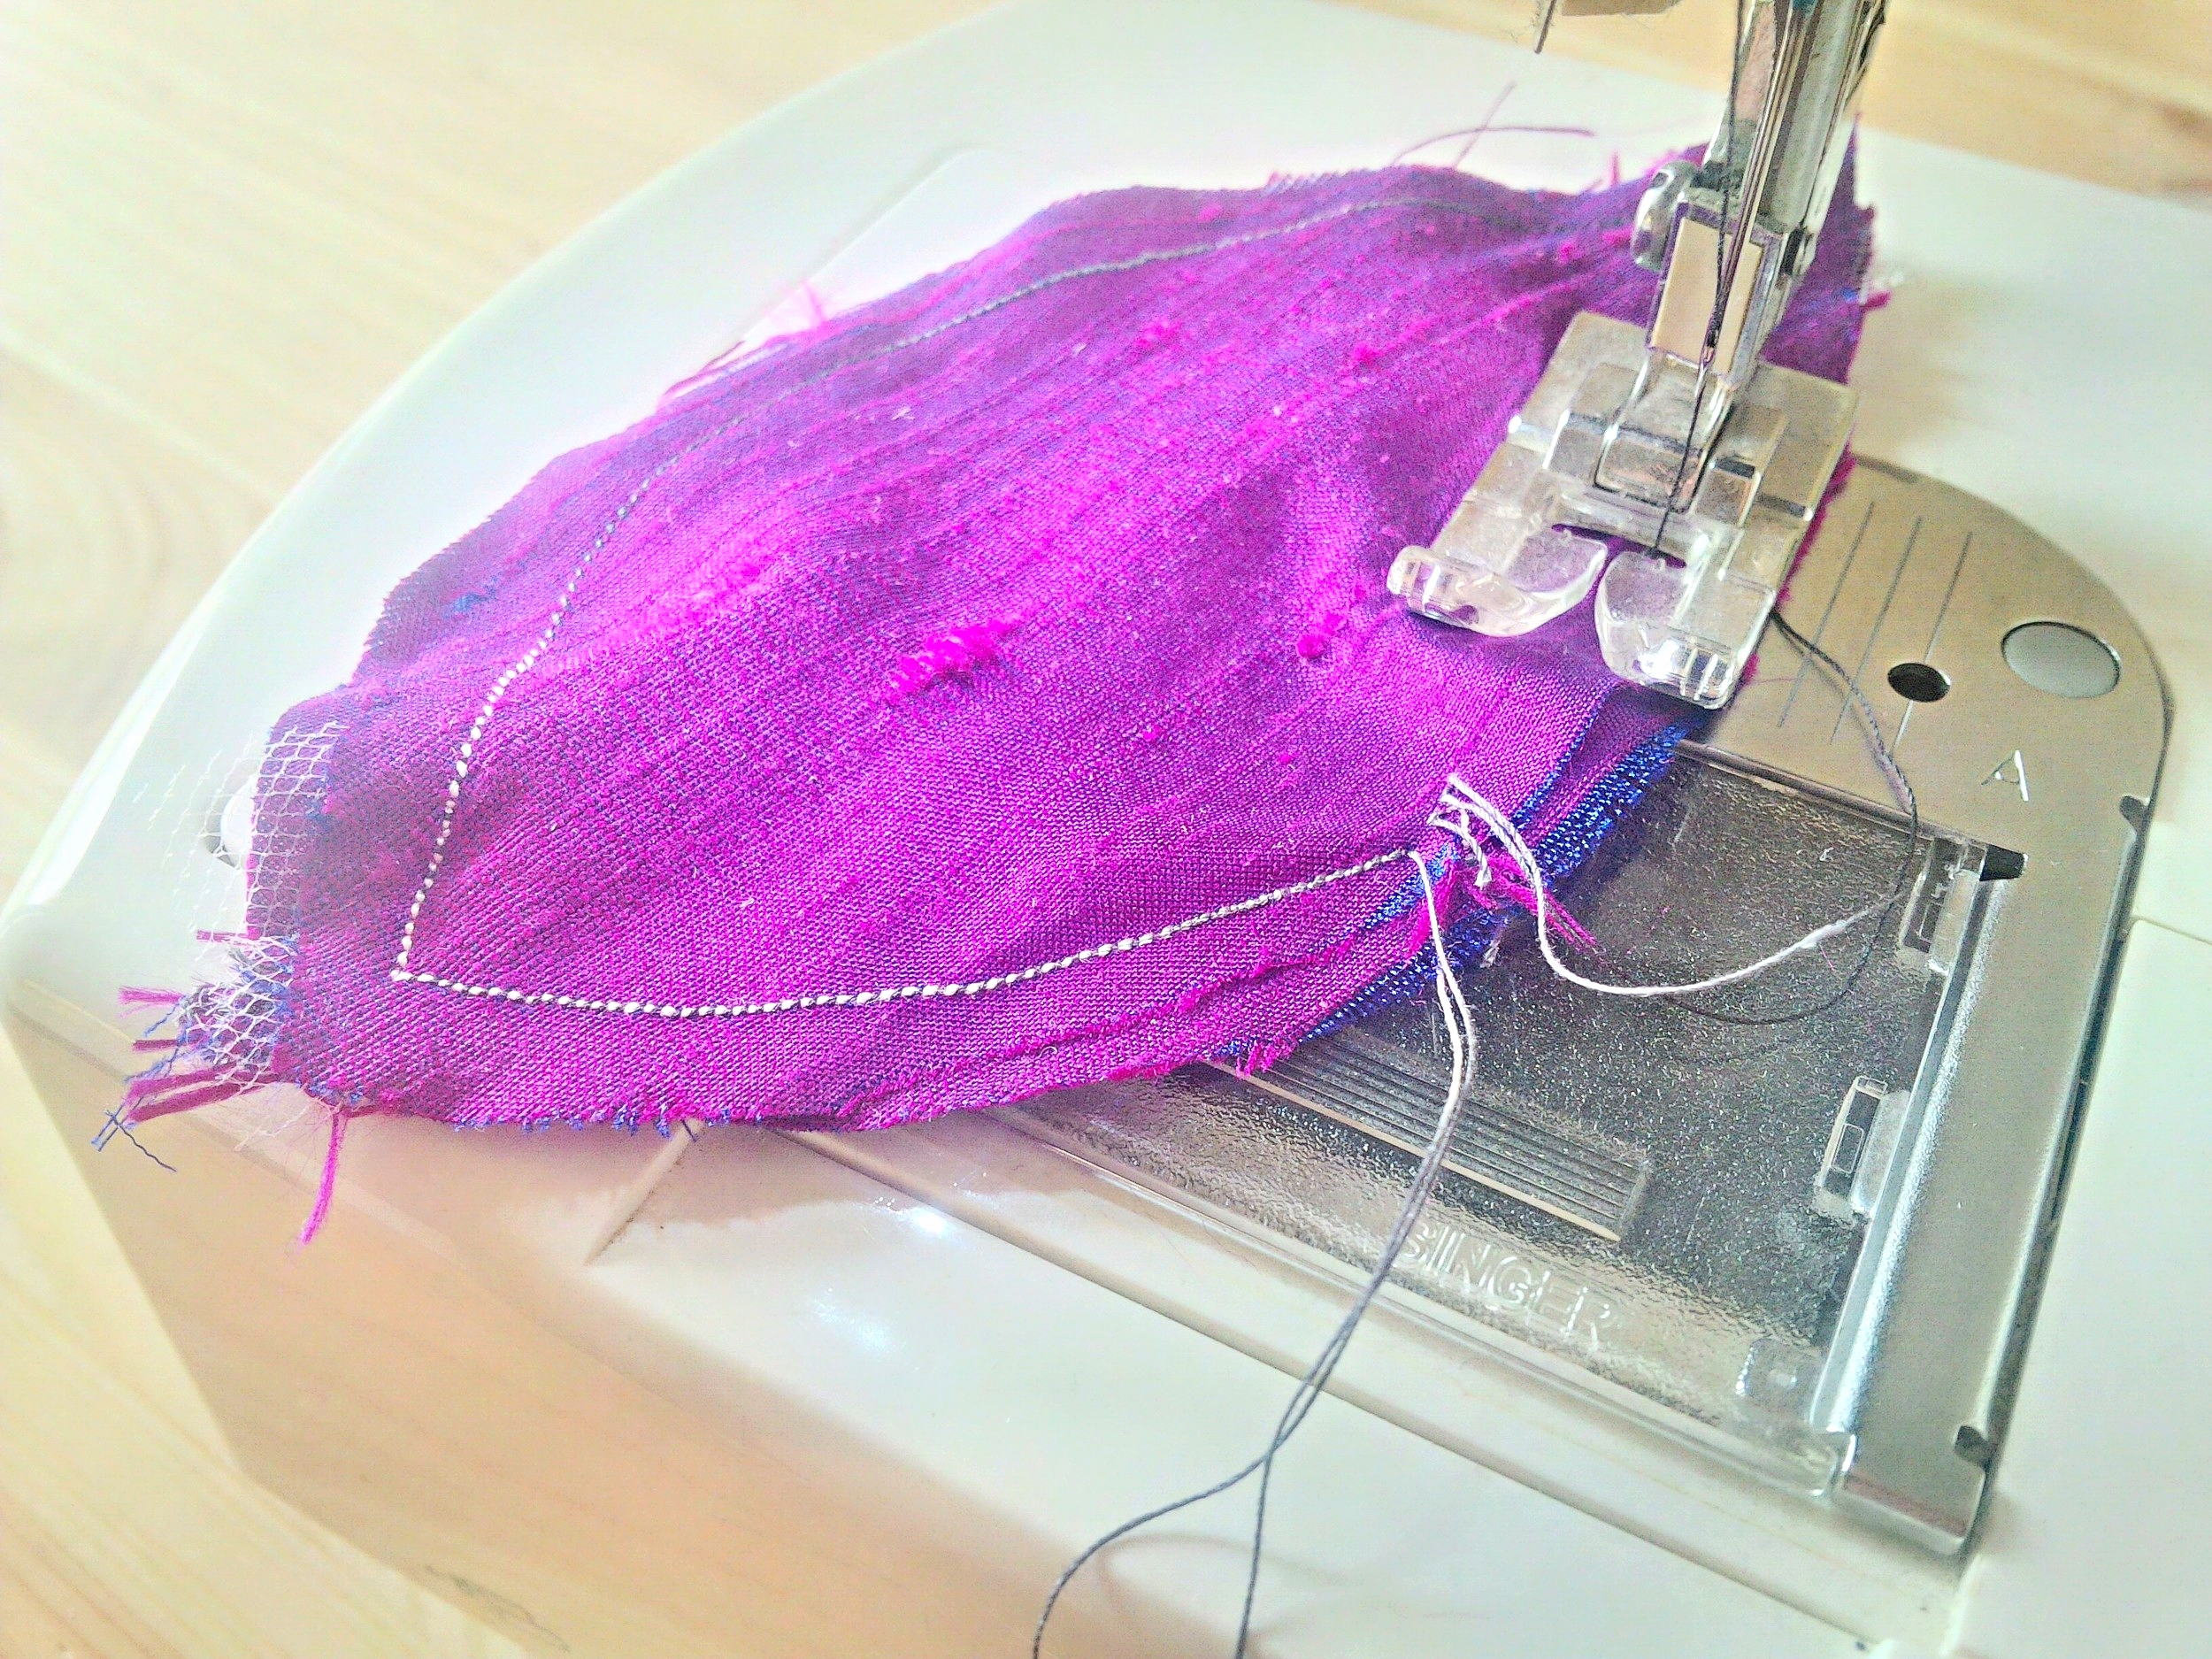
looks like my machine needs a little dusting :/
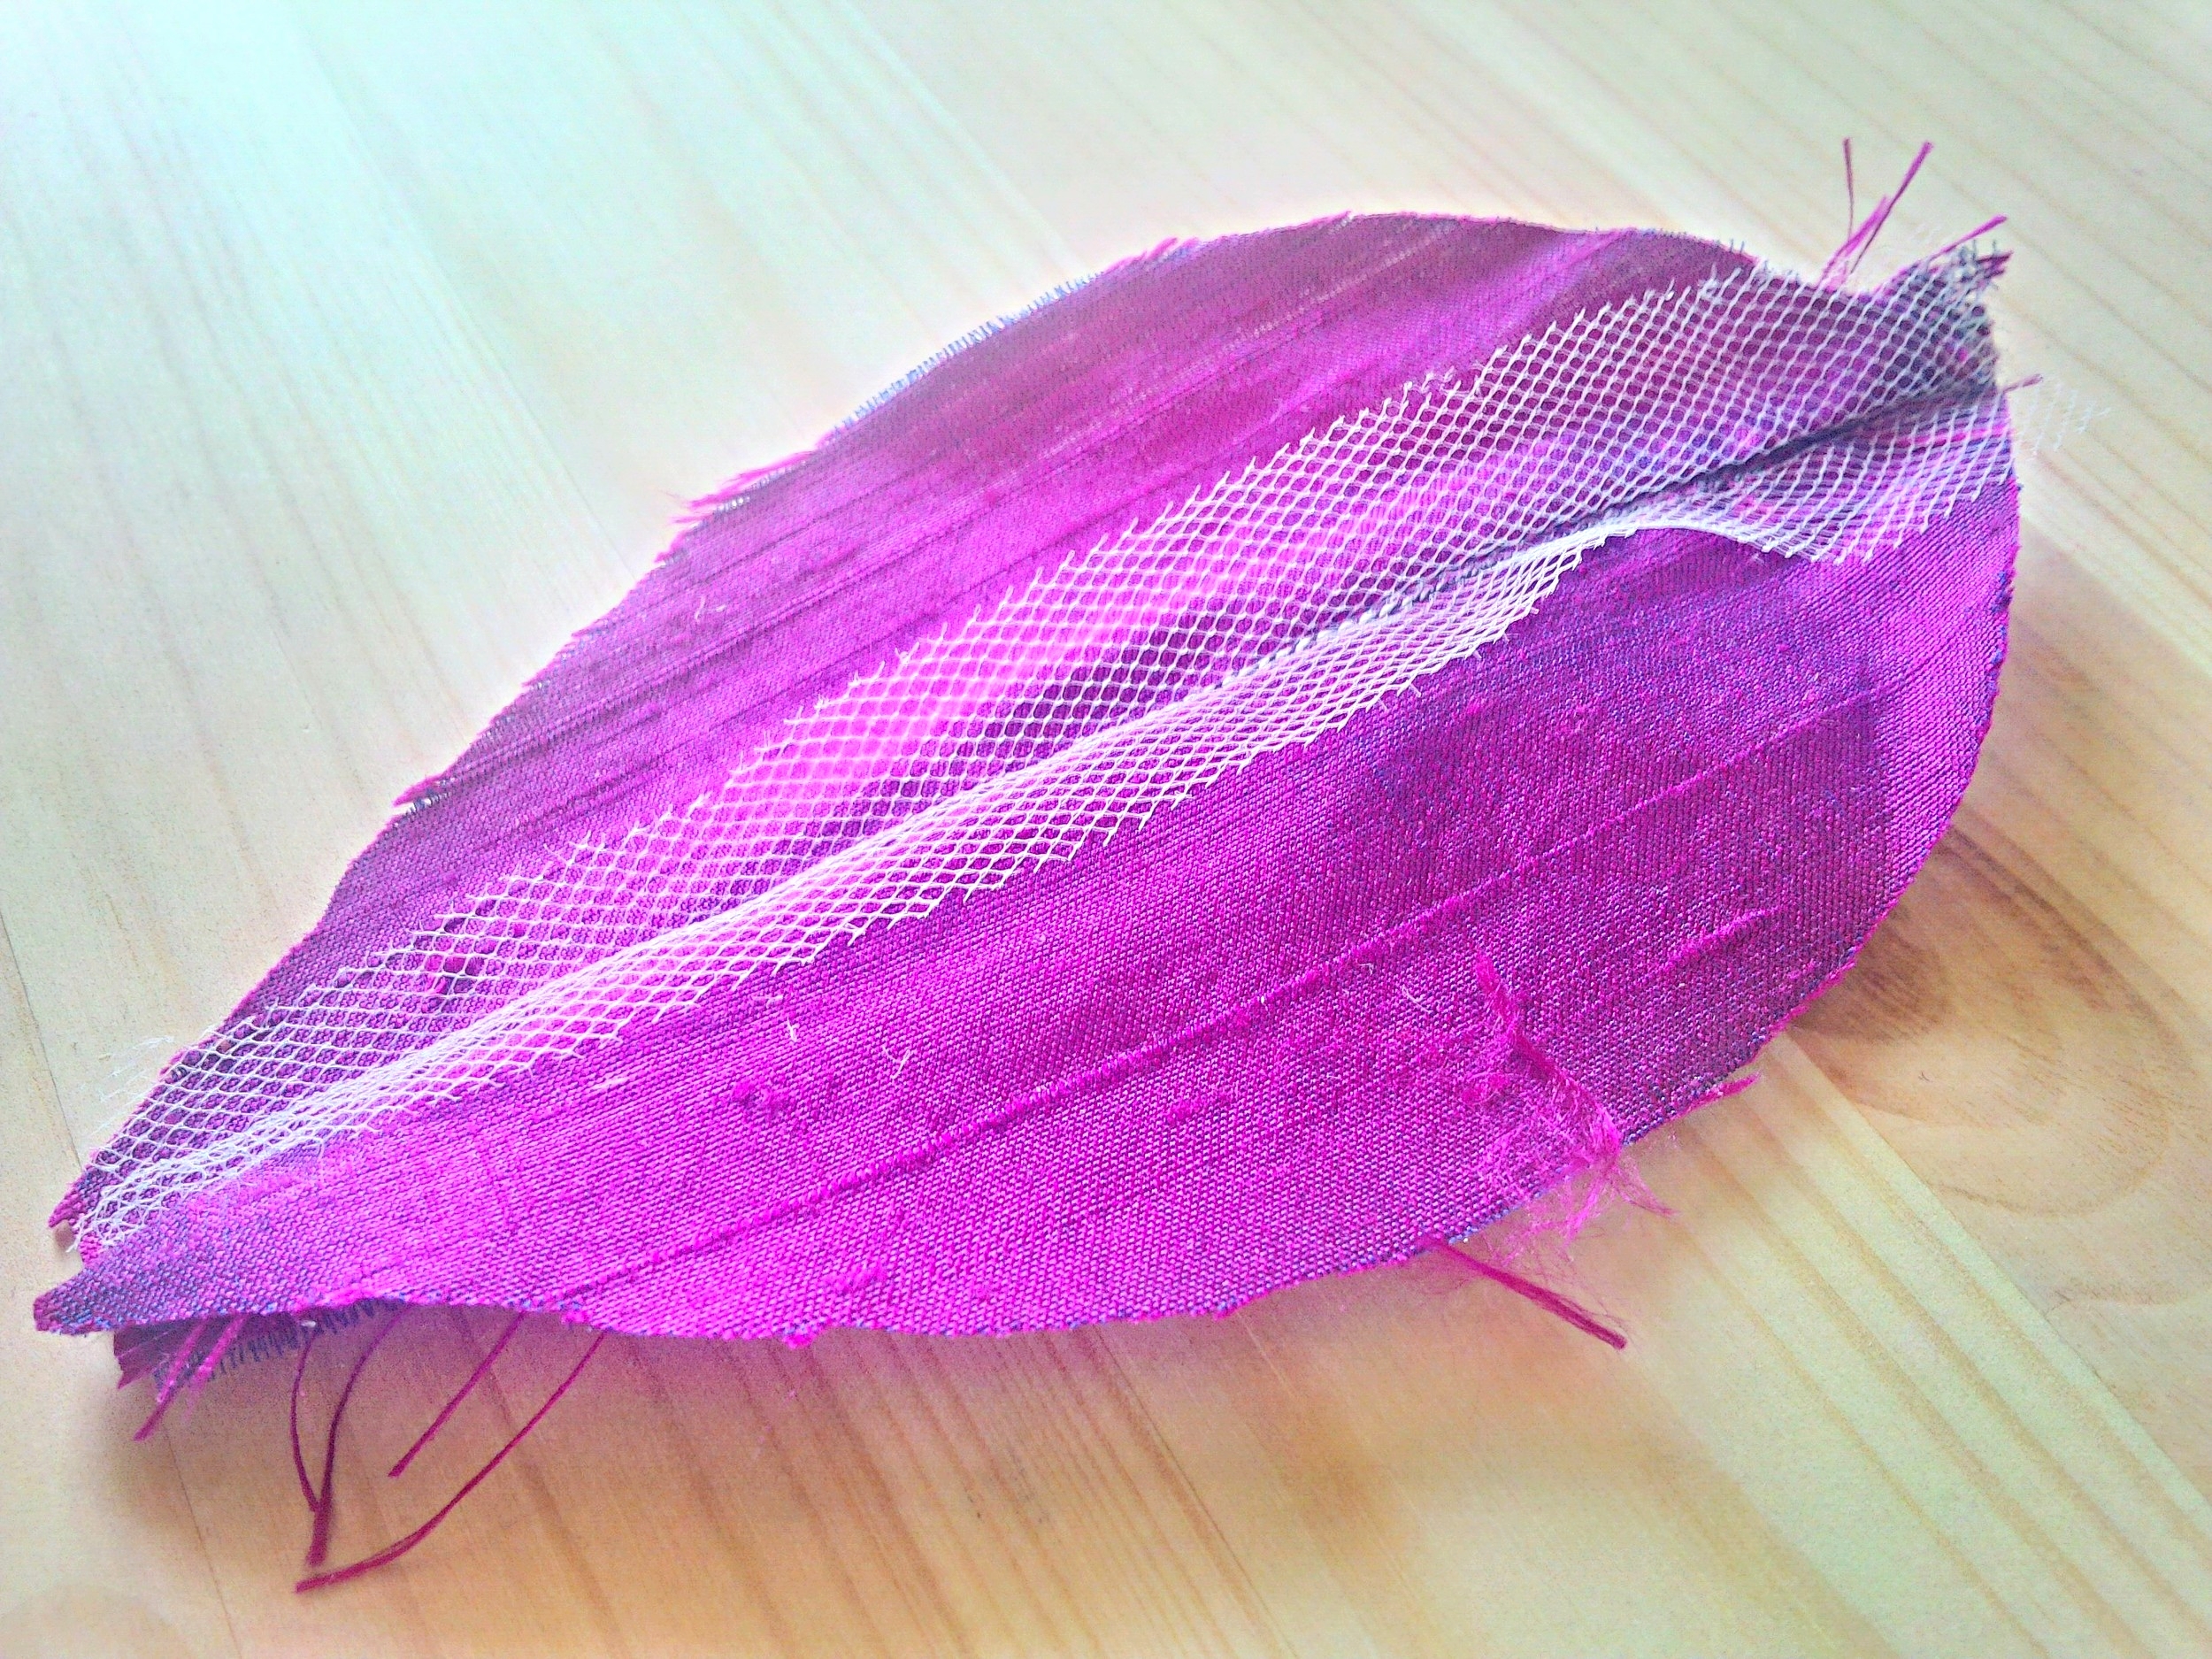
lips taking shape
You could stop now if you want, you already have a beautiful flower in your hands. OR you could finish assembling your sachet by placing the right/finished side of the lips (sewn together) and the back face piece until they line up. Sew the edges together, leaving a 1" gap to fill your sachet. This 1" is important not just to have room to fill your sachet, but also to have room for your fingers to get in there and turn it right side out. Use the eraser of a pencil to ease out the edges.
Step 5 - FUNnel
If I was Martha Stewart I would have a dedicated mini funnel which I would use to fill my handmade sachets with herbs that I grew in my garden. Sadly, I am not her, and need to rely on a piece of paper I rolled up into a cone shape. This worked at the beginning, until it didn't. Sadly, and covered in balsam fir and shame, I resorted to using the paper cone as shovel of sorts which only escalated the mess I was making. Eventually I hit rock bottom and started using my fingers to fill my vagina sachet with balsam fir tips filled with memories of the crazy B&B owner in Maine who would NOT STOP TALKING! Lessons learned? Martha would have probably suggested you put down a sheet of newspaper to collect the inevitable mess (glitter 101, amirite?). Also, invest in a mini funnel if I am making more than 1 of these at a time
Once you actually fill your sachet, close up the 1" opening with a simple stitch by hand. If you need more info on this I suggest you look to one of the many youtube videos hosted by lovely old ladies because they know everything.

DIY funnel - not yet filled with my shame
Step 6 - Finishing touches
To give my vagina a little more life, I trimmed the tulle which was sewn into the seam to let it fly free. Next, and as carefully as possible, I hot glued my gemstone to finish my Saturday Morning Craft.

And what a Saturday morning craft it was! Now, every time I open my underwear drawer I will think not just of how much of an adult I am, but of Debbie & Nathan's beautiful wedding, the shame of the Summer of 2015 balsam fir spill, and the story of Greg in a drunken stupor "trying" to poop on the lawn across the street from our B&B. Ahhhh memories.
